How to Install Fonts on Windows 10?
There are many ways that you can install fonts on your Windows 10 computer. You can use the built-in font installation tool or you can use a third-party application to install new fonts on your system. Whether you choose to use the built-in tool or another method, you’ll need to make sure that you’re installing the fonts correctly.
Installing a font by the user:
If you’re using a Windows operating system, you’re probably familiar with the fact that you can install fonts. There are a number of different ways to do it. Some methods require administrative permissions, while others can be done without them.
The first method for installing a font is through the Control Panel. This method works best if you are the only user on your machine. Once you’ve opened the Control Panel, you can drag and drop font files to the install area.
You can also install fonts using a third-party application. Many of these applications come with a font manager. This feature allows you to see all the installed fonts on your PC.
Another way to install fonts is through File Explorer. However, this method requires a little more right-clicking than the other two options.
If you’re not familiar with the process, you’ll need to start by locating the font file you want to install. Usually, these files come in a compressed ZIP folder, and you’ll need to unzip them before you can install them.
To install a font in Windows, you’ll need to have administrative privileges. Most computers running Windows have only one user, but if you want to give a new user access to a particular font, you’ll need to make sure they have administrative rights.
Uninstalling a font:
If you have fonts installed on your computer, you can uninstall them to free up hard drive space. Deleting them is a simple process. There are several ways to do this.
First, you can delete them in Windows Explorer. Navigate to the font file and then right-click. You can then click Extract’ to extract the contents. After this, you can confirm the deletion.
Another way to uninstall a font in Windows 10 is to use the Settings app. The Fonts tab is located on the left side of the Settings window. This will display the available fonts on your system.
Once you’ve decided which fonts you want to remove, you can do so from the Font settings page. From here, you can choose to delete them all at once or select a single font.
When you open the Fonts settings page, you’ll find a short preview of the font families. The font face name and metadata will also be displayed. In this section, you’ll be able to see which languages the font supports and whether it is a paid font or not.
Alternatively, you can download fonts from the Microsoft Store. Some fonts in this store are free, while others are sold for a nominal fee. It is important to remember to be logged in and to have an internet connection before starting the installation.
Restoring default font settings:
After installing Windows 10, you might want to restore the default font settings. Fonts are very important when it comes to customization. You can choose to use a particular font, or even have it replaced. These changes can be made easily.
The best way to restore the default fonts is to use a data recovery tool. This method can be used to recover files that were deleted, formatted, or damaged during a system crash.
Changing the fonts on your PC is simple. First, you will need to locate the right font. Thankfully, Windows 10 has several built-in fonts, such as Segoe UI and OpenType fonts.
If you aren’t sure what the best font to use is, look for a font that supports multi-color. This will make your text appear more colorful, and it might be easier to read.
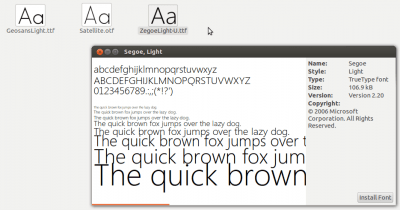
Another useful feature is the font preview. A font preview shows the type of font and its appearance in the context of the language you’re using.
The best way to restore the default Windows fonts is to use data recovery software. There are several tools available, such as EaseUS Data Recovery Wizard.
In addition to this, you can use the classic Control Panel app to restore your fonts. It’s a little more complicated, however, as you will need to backup the Registry first.


