How to Install Fonts in Windows 7:
Windows 7 allows you to quickly add new font files if you have administrator access. This allows you to create unique documents that stand out from the crowd. If you don’t have administrator access, there is a workaround you can use to add fonts without having to contact the IT department to change your account permissions.
This is a tutorial that will explain to you how to install new fonts in Windows 7 or automatically and how to install fonts without the need to have them in your Windows fonts folder. Installing fonts is very easy. All you have to do is to copy them into your Windows font folder. For most people, this won’t be a problem, but for beginners, this might become a tough job.
When you are working on a project, and you want to give it an original feel, a custom font can be useful. In Windows 7 Microsoft added an easy-to-use user interface for installing and managing fonts which is a nice upgrade over the previous drag and drop method we had in Windows Vista and XP.
Safely Add Fonts to Windows 7:
As with any type of file or software you can download to your computer, you want to be sure that any fonts you install are safe.
- Look for Fonts on reputable websites or as part of curated lists on a website you trust.
- In addition, make sure you select the correct download button. Ads containing misleading graphics that resemble download buttons can trick you into installing something potentially dangerous.
How to Install Custom Fonts in Windows 7?
- Once you have downloaded a font you like, you will need to Double-Click the .ttf file. If the download is in a.zip format, then you will need to extract it first.
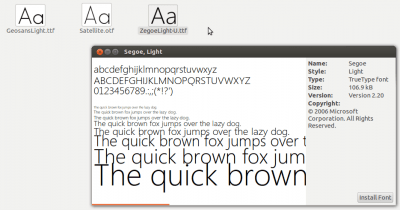
- The font previewer should open up; take a look at your font and then Click Install.
- Alternatively, if you want to skip the previewer you can just Right-Click the font.ttf file and Select install.
- Click the Start Menu Orb and then Type in fonts and press Enter.
- The Font control panel should open. Here you can view all of the currently installed fonts. Some appear grayed out because they are for foreign languages. Scroll down the window to find the font you just installed and confirm it worked correctly.
- At this point, your font is installed. You can now delete the downloaded.ttf and/or .zip file since Windows 7 copied it to the Windows/Fonts folder.
How to Install Fonts on Windows 7 from the Font Folder?
Fonts are stored in the Windows 7 fonts folder. Once you have downloaded new fonts, you can install them directly from this folder, as well.
- To access the folder quickly, press Start and select Run.
- Or press Windows key+R. Type (or paste) %windir%\fonts into the Open box and select OK.
- Go to the File menu and choose Install New Font.
- Navigate to the location where you saved the extracted font.
- Select the file you want to install. If you want to install several fonts, press and hold the Ctrl key while selecting the file.
- Select Copy Fonts To Fonts Folder and choose OK.
Conclusion:
That is all there is to it. If things still don’t look quite right feel free to run through the wizard a few more times and adjust all of your hardware settings along with it. The above post contains the details about How to Install Fonts in Windows 7. We hope that you will understand the whole process of installation of fonts in your Windows 7.
As of January 2020, Microsoft is no longer supporting Windows 7. We recommend upgrading to Windows 10 to continue receiving security updates and technical support. Still, if you have any questions then ask here below in the comments section.
