How to Use Font Awesome Icons in HTML?
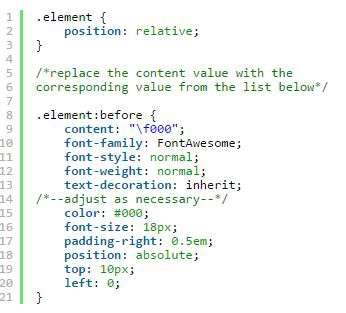
Icons are highly important in web design, they are a great way to catch the eye of users and communicate important information visually. The Font Awesome library contains a huge range of icons and allows you to style them using CSS which is very easy. Each icon has a specific class that defines its color and size. You can include this CSS in your site’s stylesheet or do it inline, it is up to you how you want to work.
First, you will need to create an account on the Font Awesome website. This is free and will give you access to their entire library of icons. Once you’ve done that you can select which icons you want and get the code for them. This can be done on their Start page or by visiting the individual icon pages.
The icons themselves are vector graphics which means that they can be scaled to any size without losing quality. This makes them very versatile and fast to load. They also work great with text and can be styled to match any design you have. The icons are usually used within a span> but can be placed inside any other HTML element too, such as div>.
There are several ways to incorporate these icons into your site. You can add them to the head> section of your site, or you can use one of the many WordPress plugins that allow you to do this. In Divi, the easiest way is to place an icon in a block that can accept CSS, such as a Text or Image module.
To use Font Awesome icons in HTML, you can follow these steps:
- Include the Font Awesome CSS library in your HTML file. You can do this by adding the following line of code within the
<head>section of your HTML document:
<link rel="stylesheet" href="https://cdnjs.cloudflare.com/ajax/libs/font-awesome/5.15.3/css/all.min.css">
This line of code will import the Font Awesome CSS file from a CDN (Content Delivery Network). Make sure you have an active internet connection to fetch the file.
- Once you have included the CSS file. You can start using the Font Awesome icons in your HTML markup. Font Awesome icons are represented using the
<i>element with specific class names. For example, to add a search icon, you can use the following code:
<i class="fas fa-search"></i>
So, in this example, the class “fas” is used to specify the Font Awesome style. And “fa-search” refers to the search icon.
- You can also apply additional styling to the icons by adding classes to the
<i>element. For instance, to make the icon larger, you can use the “fa-lg” class:
<i class="fas fa-search fa-lg"></i>
Font Awesome provides various classes for size, color, rotation, and other styling options. You can refer to the Font Awesome documentation for a complete list of available classes and examples.
- You can place the Font Awesome icons anywhere in your HTML markups. Such as within headings, paragraphs, buttons, or any other HTML element.
Here’s a complete example of using a Font Awesome icon within a button:
<button><i class="fas fa-check-circle"></i> Submit</button>
So, that’s it! You can now use Font Awesome icons in your HTML by including the CSS file and utilizing the appropriate class names. Remember to check the Font Awesome documentation for more details on available icons and customization options.





![Techno Font Style APK [Download] techno-font-style-apk](https://samsungfontsapk.com/wp-content/uploads/2022/03/Techno-Font-Style-APK-e1646944904517.jpeg)