How to Install Fonts in Word
Microsoft Word comes with a long list of fonts to choose from. But depending on what your goal with the documents is, you may want to use a font that is on the list. The good news installing fonts is easy. You can add and install new fonts to inject some personality into your work.
Microsoft Word is an incredible app used by several people around the world. It has tons of features to make it a well-rounded writing and editing platform. The fact it comes with so many fonts is another one of its excellent features.
Microsoft Word is the most popular tool for people to create content with words, tables, and images. Nowadays, Microsoft Word has well developed, and it offers compatibility for people using any device to access the content editing functions.
However, despite the wide choice range, you may not find the right match at times. Sometimes you may need something funkier to achieve that “wow” effect. The good news is you can do this. All you have to do is find and download the font you like and then add it to Word.
How to Install Font Files to Word on Windows?
Adding a font in Word on Windows is easy and only takes a few clicks. Let’s learn how to install a font on Windows so we can then add it to Word. Installing a font on Word is the same as Windows all the way back to Windows 7. Before adding a font to Microsoft Word, you have to first download the fonts. Let’s take a look at how you can achieve this.
- Go to the font manager on your Windows desktop. Click on Start, followed by ControlBefore Panel.
- Select Fonts. A font menu will appear.
- Choose the font that you want to add to Microsoft Word and then download it.
- The font will be saved to the folder on your Windows desktop once the download folder is complete. The file will then be saved in TTF or OTF format.
- At this stage, you will have to add fonts to Microsft Word. Since you have already downloaded the font file, you can process to open the font control panel on Windows again.
- Drag the font folder to the font control panel. This will successfully add the font to your system.
- Once the font is added, it will be automatically installed as well.
- Once the font is installed on your Windows. It will be automatically added to your Microsoft Word. Therefore, you don’t need to do much here.
- You can then open the Word software and use the font by selecting it in the font menu.
How to Import Fonts into Word on Mac?
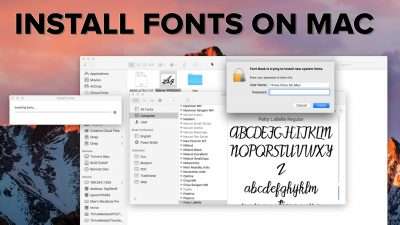
Before you use new Microsoft Word fonts on Mac, you must add them to the app for managing fonts on macOS, the Font Book.
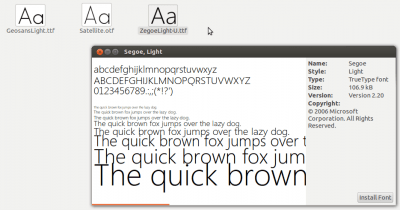
- Locate your font file and double-click it to open the font preview window. You may need to unzip the file first.
- Click Install font near the bottom of the preview window, which should open the Font Book.
- If you are using the 2011 version of Office for Mac. Then you must also drag and drop the file into the Windows Office Compatible collection, which can be found in the left sidebar of the Font Book.
- After Restarting your Mac, the font should be available in Word and most other apps including PowerPoint and Excel.
Conclusion:
It is not complicated to add fonts to word, no matter what you are using what kind of device, or desktop. Or mobile devices like Android and iOS. With some assisting software and the powerful functionality of Microsoft Word. You can personalized outcomes.
The above guide will help you to easily install fonts into Word. So ready carefully till the end before applying it on your device. Share with your friends and followers to help them as well. We hope that we provide content that is related to your topic.
